")
")
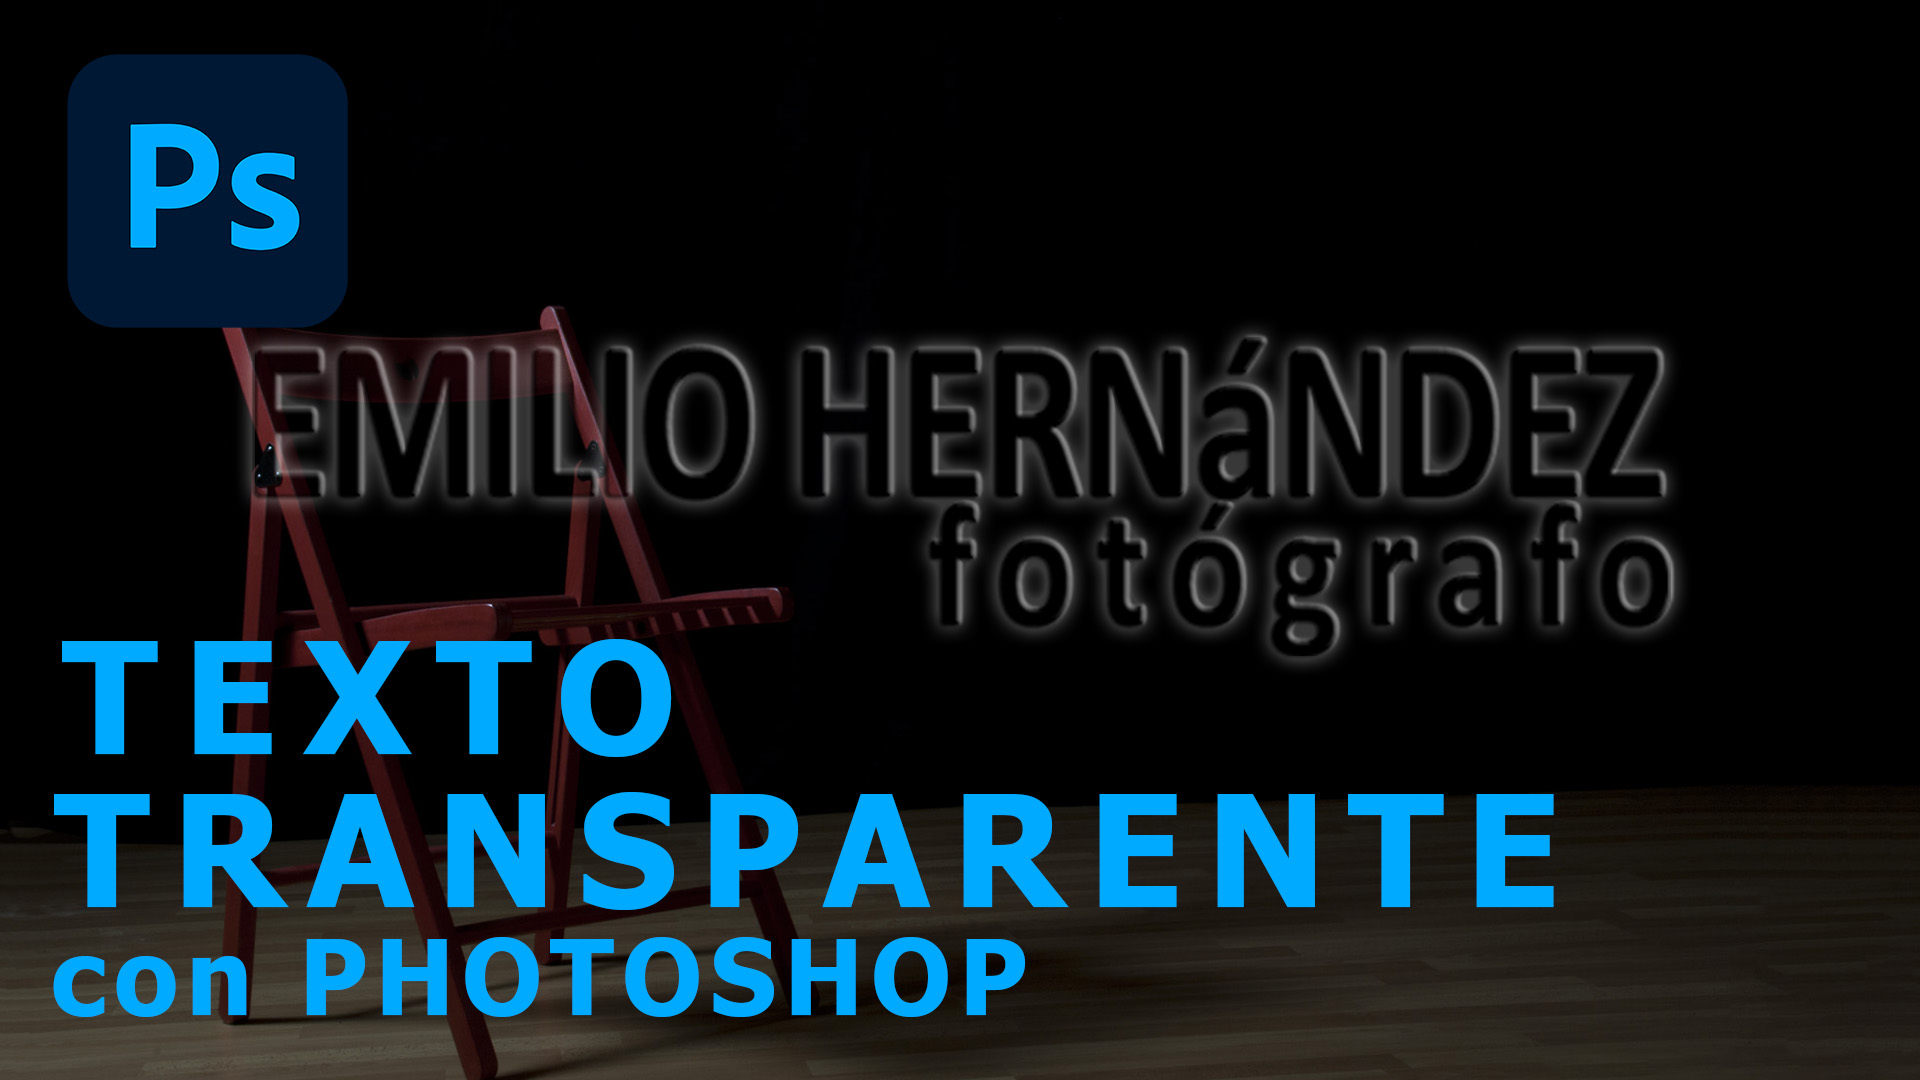
Transparent Text in Photoshop: The Definitive Method for Seamless Integration
In photo editing, seamlessly integrating text into an image is crucial for maintaining visual coherence and conveying the intended message. One effective technique to achieve this is creating transparent text, allowing the background image to show through the letters, resulting in a subtle and professional effect.
This tutorial will guide you step-by-step in creating transparent text in Adobe Photoshop, utilizing the 'Fill' property of the text layer and advanced blending options. Unlike traditional blending modes, this method offers greater control and versatility, especially when working with multi-colored texts or complex designs.
You will learn how to:
- Create a text layer and adjust its 'Fill' to achieve the desired transparency.
- Apply layer styles and advanced blending options to effectively integrate the text.
- Adapt the technique to various contexts and visual styles, from minimalist designs to more elaborate compositions.
Mastering this technique will enhance the quality of your photographic and design projects, delivering professional and visually appealing results.
Transparent text
- Verfügbare Untertitel: Deutsch, Englisch, Spanisch, Französisch, Italienisch und Portugiesisch. Wähle deine Sprache.
- Available subtitles: German, English, Spanish, French, Italian and Portuguese. Select your language.
- Disponibles subtítulos: Alemán, English, Español, Francés, Italiano y Portugués. Selecciona tu idioma.
- Sous-titres disponibles : Allemand, Anglais, Espagnol, Français, Italien et Portugais. Choisissez votre langue.
- Sottotitoli disponibili: Tedesco, Inglese, Spagnolo, Francese, Italiano e Portoghese. Seleziona la tua lingua.
- Legendas disponíveis: Alemão, Inglês, Espanhol, Francês, Italiano e Português. Selecione sua lingua.
You prefer to watch it on YouTube. And if you like it, don't hesitate to 'Like', 'Share with your friends' and subscribe to my channel.
Take a look at the before and after retouching applying the tutorial you just saw. Move the central bar with your mouse to move the effect. (The photos should appear below, otherwise refresh the page -F5)